How To Start An Online Clothing Store
I am an affiliate with links to an online retailer in this blog post. When you read what I have written about a particular product and click on that link and buy something from the retailer, I can earn a commission. Please note that I only recommend products that I truly believe in and use in my business. Please read my full disclaimer here
 When the idea first came in my head that I wanted to start an online clothing store, the first thing that I thought about was where would I find stock for my store, how was I going to take payments from my customers and would I need to know extensive design to create my store or hire a web designer?
I wanted simplicity and the only way to find that simplicity was through an online store builder.
An online store builder is a platform that allows you to host your own store. All designs are completed for you.
All you have to do is create a theme, upload your products and connect a payment account.
At the time I wanted to start an online clothing store but I did not realise it could be that easy.
I am so glad it took away all the complexity from running my online business.
I created my online store with Shopify and in this post I want to show you how simple it is to start an online clothing store (or whatever product you may decide to sell).
How to Start An Online Clothing Store In 7 Easy Steps
1. Create A Shopify Account
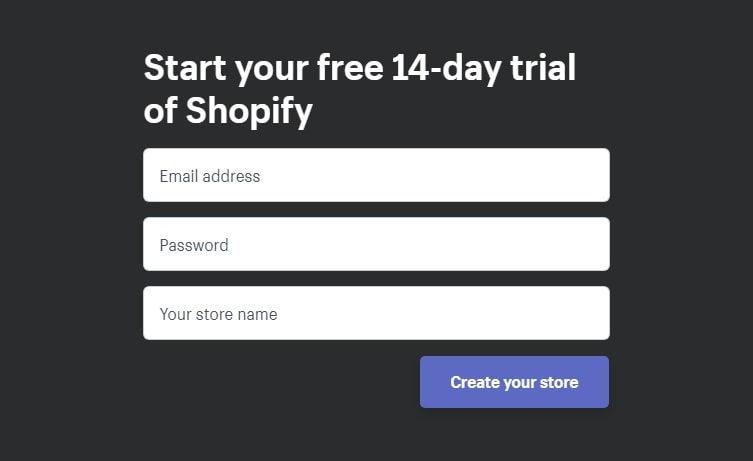
To get started you must create a Shopify account.
Shopify gives you a 14-day free trial so you can test out its usability and decide whether it is something that you would like to continue to use.
Once the 14-day trial is over, you may choose your price plan that suits your budget.
|Basic Plan
Shopify’s plans start from $29 per month which is their basic plan.
With their basic plan you get the absolute minimum that you need to run your store. This includes 24/7 support, fraud analysis to ensure that you only receive genuine payments, free SSL certificate, website and blog, etc.
As a basic member you can assign two assistants to manage your store if you want to.
So if you wish to start an online clothing store, you may hire an assistant to add all the products for you or you may have an advertiser helping you promote your store. Instead of giving them your username and password, you can assign admin rights to the advertiser, so they can create their own admin account under your store.
Shopify does have its own transaction fees and for the basic plan it is 2.9% + 0.30c.
|Shopify Plan (recommended)
There is also the Shopify plan which is highly recommend as it gives you everything you need to grow your eCommerce business.
This includes everything from the basic plan plus the ability to create professional reports, gift cards for your customers and their amazing abandoned cart recovery feature.
I chose the Shopify plan because of their abandoned cart recovery feature.
If a customer adds an item to their cart but does not purchase immediately, Shopify will record this and send the customer an email automatically inviting them to complete their purchase.
I have been able to recover many abandoned carts from this feature so it is a valuable tool to have in your store.
If you want assistance with your store you can assign five users.
The Shopify plan is $79 per month and transaction fees are 2.6% + 0.30c.
|Advanced Plan
Then there is their advanced plan which, in addition to everything you get with their Shopify plan, you also have an advanced report builder and third party calculated shipping rates included within its interface.
You can assign 15 assistants to your store.
The advanced plan is $299.00 per month and transaction fees are 2.4% + 0.30c.
2. Choose A Store Name
At the time of creating your account you must decide on your store name.
Every store is given the domain “.myshopify.com” so whatever store name you choose, your final URL will be storename.myshopify.com
If you prefer to substitute Shopify’s subdomain for your own unique domain name, you can visit Namecheap and purchase your own custom domain name.
I prefer to use Namecheap over Godaddy or any other domain provider, since Namecheap offers very inexpensive domain names with a number of creative domain extensions like .live, .shop, .online or even .posh.
Shopify will then allow you to redirect your custom domain to their domain and all you will need to do is give your custom domain name to your audience.
I would recommend that you take some time to think about what you want your store name to be.
Once you have created the name, you are unable to change it.
3. Choose A Theme And Customise
What I love about Shopify is how simple their themes are. I use the Brooklyn Theme.
It makes your store look professional, crisp and clean.
You can easily make basic changes to the colour schemes, the fonts or the layout of your store.
The features are also drag and drop.
If you know HTML and CSS you can edit the codes within the Shopify platform to customise your store exactly how you want it to be.
Do not worry if you do not know HTML or CSS.
As a Basic Shopify plan member or higher, you will get one hour of complimentary design time. With this complimentary design time you can ask the Shopify designer to add any type of feature you want.
If however your requirements are more extensive, then you can hire a Shopify expert instead.
To find the best theme for you, spend some time browsing the Shopify theme store.
Themes are free and paid.
If you have built your store but you have changed your mind about the theme you have used, then you can easily change the theme without worrying about whether the layout will be affected.
Shopify makes changing the theme of your store effortless and ensures that any product you have already added to the store is transported from your old theme to your new theme without interrupting the appearance of the store.
4. Add Your Products
Adding products to your store is very simple.
Before you add your product you must first create Categories or Collections as Shopify refers to them.
When you start an online clothing store your Collections can be Tops, Pants, Dresses, Skirts or Shoes.
To create a Collection within your Shopify admin Dashboard, click on the Products tab image, then Collections, then the blue button Create Collection.
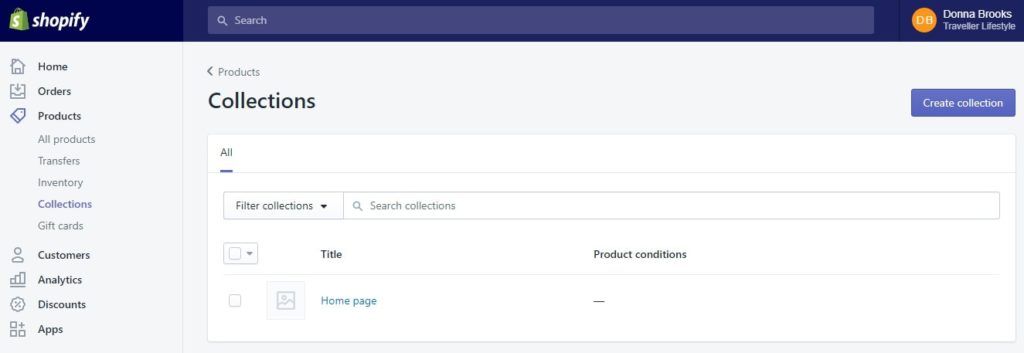
Add all the collections that you would like to use here.
Next add your product by going back to the Products tab image, then Products and All Products.
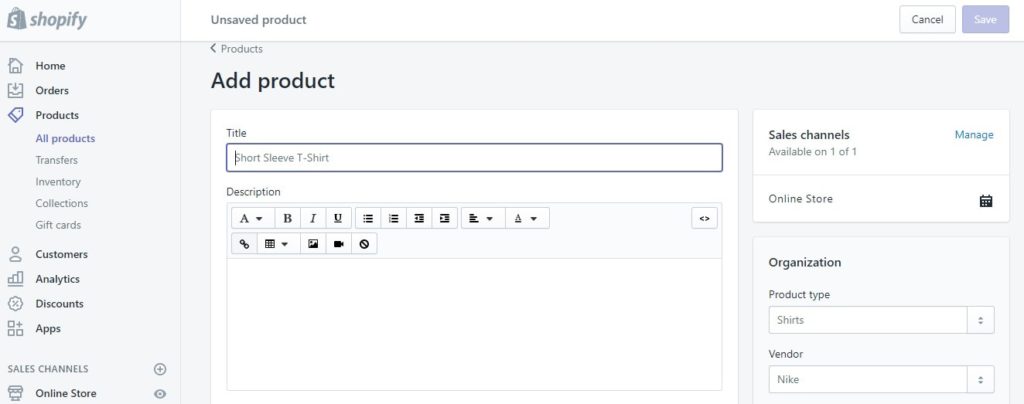
Complete the fields with as much information as possible to help your visitor understand the product. This will include a description of the item, the size of the item, the price, etc. Include an image of the item too.
These are the basic things that you should include however a good rule of thumb is to keep it simple.
Some experts say that it is better to write detailed product descriptions as they help with conversions, but I have tested this and for me, my store converts better with short and simple product descriptions.
You can test to see which one works best for your store.
5. Set Up Your Payment Gateway
A payment gateway is how you will receive your payments from your customers.
Shopify offers many different payment gateway options so you need to select the right one for you.

When I started with Shopify I used Stripe and PayPal.
However as I continued to use PayPal and got a sudden influx of orders, PayPal placed a limit on my account.
This meant I was unable to withdraw the funds from my PayPal account immediately.
Be careful when using PayPal. You will want to ensure that this is the best platform for you, if you decide to use it.
Aside from Stripe and PayPal there are other payment gateways you can use depending on your country.
When choosing the payment gateways here are a few things to consider:
|Transaction fees
Transaction fees are applied by the payment processor. Each payment platform such as Stripe or PayPal have their own transaction fees for each purchase that is made by the customer.
As the owner of the store, you will pay that transaction fee which is deducted from the amount that you receive from the customer.
The transaction fee is usually a small percentage of the sale price and can be as low as 2.9% + .30c (Stripe & PayPal).
Be sure to check out each payment gateway’s transaction fees and factor this into your product retail price to ensure that you make a good return on investment.
|Card Types
It is important to know what type of payment cards are accepted by the payment gateways.
For example some gateways may accept Visa or Mastercard but not American Express.
If you have chosen a payment gateway, Shopify also allows you to offer PayPal as a payment option to your customers.
Some people have found that by including PayPal as a payment option, it increases conversions.
Because of the issues that I had with PayPal I disabled this as an option.
I really did not notice a decrease in my sales conversions after doing so.
|Offsite Checkout
Some payment gateways take your customer away from your store so they can make the purchase on the payment gateway’s own website.
Once the payment is confirmed, the customer is then redirected back to your website.
Whilst you may have control over the look and feel of the checkout page with the offsite checkout option, be careful.
Customers tend to get suspicious when they are not familiar with a payment gateway and have to leave a site to complete their purchase.
|Taxes
If you have a clothing store it is likely you will need to charge taxes on the product.
You can indicate to Shopify whether you would like to automatically apply the taxes to the product or whether your price already includes the tax.
When you are in the Product section of your store, edit the product that you want to charge tax on.
Scroll down to the section titled Inventory & Variants.
Click on Product Variant which will open in a new dialog window.
Ensure that the checkbox next to Charge Taxes and Requires Shipping is marked. This tells Shopify that you intend to charge the customer both shipping and taxes and they will apply your rates once you have configured this.
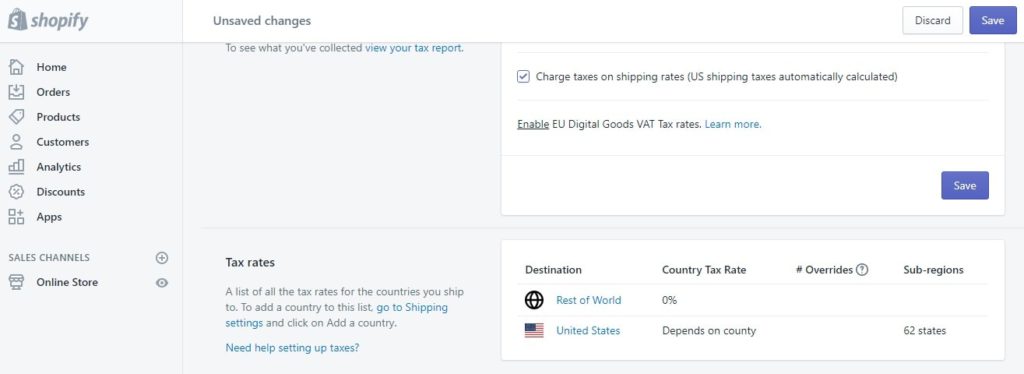
To configure the taxes go to the gear icon on your dashboard where you will enter the Settings page. Click on Taxes and then enter the relevant tax rates for your store.
You can add tax rates based on the country the customer is in.
To configure the shipping rates, use the Shipping page and enter the relevant shipping rates that you want to apply.
6. Test Your Store
Before you go live this is a crucial step that you must take to ensure that the customer journey is easy and that you get paid!
It is the worst thing when you go live, that your payment gateways do not work or your buttons on your shop do not link to the correct products.
Simply do a test purchase or click through a few buttons on the site to ensure that the functionality of the store is how you want it to be.
Sometimes excitement gets the better of us and we forget this important step.
You do not want to do that.
Shopify allows you to test purchases on your store before going live.
To do so:
- From your admin dashboard, click Settings then Payments.
- If your payment gateway is already activated, deactivate it.
- In the Shopify Payments section, click Edit
- Check the box Use Test Mode
- Click Save.
- Make a test purchase as a customer would.
Once you have satisfactorily tested the payment, make sure to revert to the appropriate payment gateway that you do actually want to use.
7. Go Live
Now that everything is set up you are ready to take your first order.
Make sure that you download the Shopify app.
It immediately creates a cha-ching ring when you receive an order. The sound of that cha-ching really excites me. LOL
Shopify will also give you all your customer’s details so you may ship the order to them.
Where To Advertise Your Store
How do you get traffic to your store?
If no one knows your store is live then there is no way for you to make sales.
This is why it is so important to advertise your store so that you can tell the world that you are in business.
In my article How To Get Traffic To Your Online Store I break down four ways that you can get traffic to your store to help your brand succeed.
Be sure to check it out.
- Related Article: Social Media Case Study: How I Generated Over $19,000 With Ecommerce
Final Words
With many online platforms being boxed and packaged, anyone can start an online clothing store right from their desktop.
The power of technology and the internet is super amazing.
The Shopify platform is one of the easiest to set up and use. Plus it allows you to focus more on marketing your website instead of maintaining your site.
Hey, if you are brand new to eCommerce or are looking for some additional help in getting started with eCommerce, getting your online store set up and getting your first online store sale then I would highly recommend that you check out my blog post where I uncover the 8 best eCommerce courses you can use to help you learn how to market your online store, how to get traffic to your online store and how to generate sales with your online store.
In this blog post, I break down the pros and cons of each course, what you actually get and if it is worth the investment.
Also if you want some inspiration to get started, check out my blog post How I Made Over $7k In Less Than One Month using Shopify.
Have you started your online clothing store yet? Tell me in the comments how it went.
Cheers,

 Previous Post
 Next Post


Dawn-Marie, thank you so much for this. Is the building platform for the store only? To get up and running, do I find wholesalers for products?
Hey Dee, yes the building platform is only for the store. You will need to find your own wholesalers for the products you want to offer.
Awesome blog post I just started my Shopify store. I signed up for the four percent ecom course watched the first video and now trying to watch the second video. I can select it. Has the course expired?
Hi Trell I am not sure about the 4% ecom product. It is not a product that I purchased. You will need to reach out to their support.